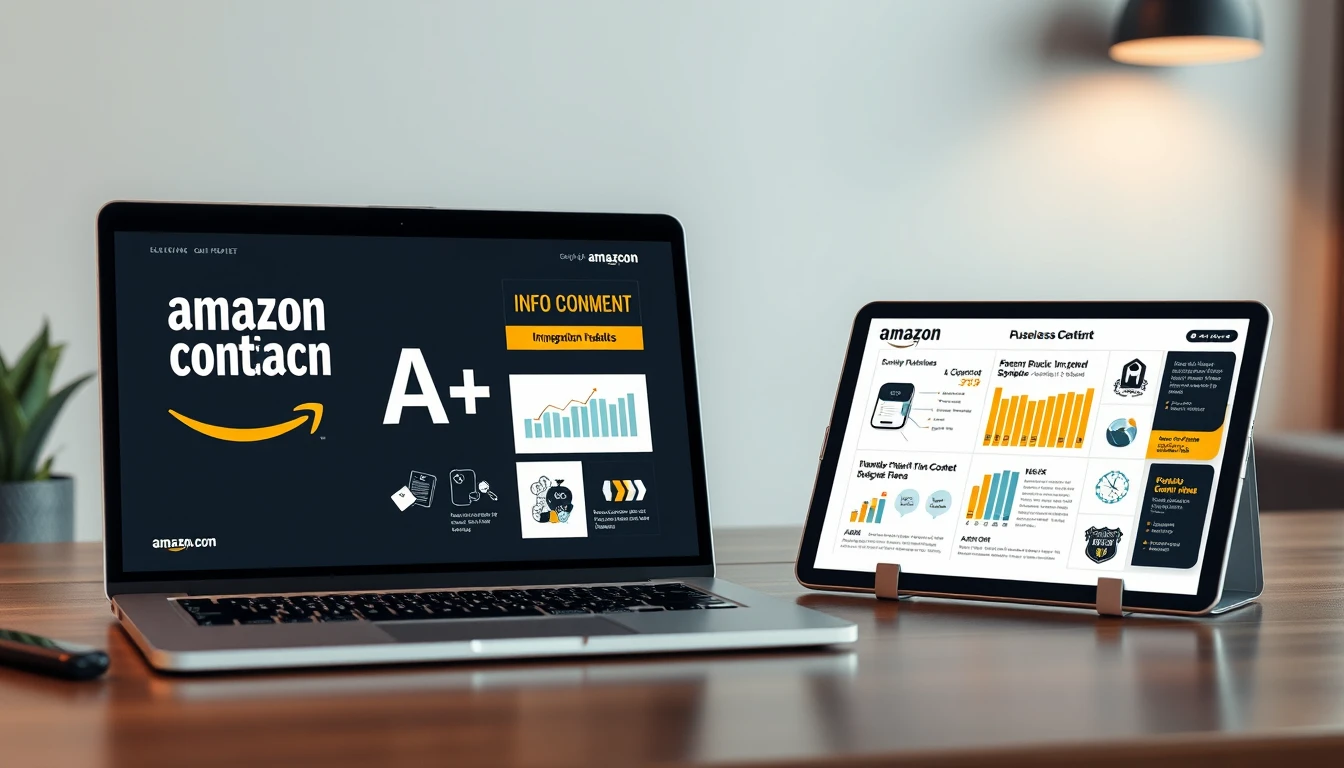
The Fast Rule: Amazon A+ Content for Non-Fiction Books
Amazon A+ Content allows KDP authors to replace the drab, plain-text product description with rich visual marketing banners, 3D book mockups, comparison charts, and editorial endorsements directly below the fold on your Amazon book listing. Data shows well-executed A+ Content boosts non-fiction book conversion rates by 15% to 32% by giving hesitant browsers visual proof of book quality, skimming readers a roadmap of key frameworks, and business readers tangible evidence of author authority.
The Fast Rule: Amazon A+ Content for Non-Fiction Books
Amazon A+ Content allows KDP authors to replace the drab, plain-text product description with rich visual marketing banners, 3D book mockups, comparison charts, and editorial endorsements directly below the fold on your Amazon book listing. Data shows well-executed A+ Content boosts non-fiction book conversion rates by 15% to 32% by giving hesitant browsers visual proof of book quality, skimming readers a roadmap of key frameworks, and business readers tangible evidence of author authority.
- ✓ Standard Image Header with Text (970 x 600 px) & Full Width Banners (970 x 300 px) drive the highest visual impact.
- ✓ Lead with author authority, key framework diagrams, and 3D interior spread mockups rather than generic quotes.
- ✓ Amazon allows up to 5 modules per ASIN; assemble a cohesive visual story from Hook to Proof to Chapter Breakdown.
The Psychology of the Amazon Book Buyer: Why A+ Content Drives 20-30% Conversion Lifts
The Psychology of the Amazon Book Buyer: Why A+ Content Drives 20-30% Conversion Lifts
A shopper lands on your book detail page. You have roughly 2.7 seconds before their thumb moves. That is not a marketing aphorism. It is the observed dwell time Amazon's own mobile heatmap studies suggest for above-the-fold content on a 390-pixel-wide viewport. Your cover, your title, your price, your star rating. Four data points. Then the scroll begins.
What happens next determines whether you sell 42 books this month or 61. Same traffic. Same ad spend. Same royalty per unit. The variable is not your writing. It is how the page feels to a buyer who has never heard of you and is deciding, in under nine seconds, whether your 240-page business book is worth $8.99 and three evenings of their life.
Ready to stop guessing at formatting? BooklierAi converts your raw notes, voice memos, or rough drafts into a print-ready 6x9" trade paperback and a validated ePub 3 file — with calculated gutter margins, mirror running headers, and PDF/X-1a export built in. No InDesign license. No preflight headaches.
Turn your idea into digital ebook today (2 free credits)
The F-Pattern Skim: Where Your Description Actually Goes to Die
Eye-tracking data on Amazon detail pages shows a consistent F-pattern on desktop and a compressed, vertical version of the same pattern on mobile. The buyer reads the first two lines of your book description. Then their eye jumps left, scans a shorter second pass, and exits. On mobile — where 71% of Amazon book purchases now originate — that exit happens faster, because the description block is collapsed behind a "Read more" tap target that most shoppers never press.
Here is the number that should reframe your entire listing strategy: roughly 80% of shoppers scroll past the description entirely. They land on the editorial reviews, the "From the Publisher" section, or the product images. If your listing is plain text — a wall of 4,000 characters in Amazon's default serif — you have handed the buyer nothing to look at during the exact moment they are most receptive.
Plain-text descriptions fail for three structural reasons:
- No visual anchor. Text-only blocks on a white background read as "self-published, unedited, low-production-value." The buyer's brain pattern-matches to a PDF someone uploaded at 2 a.m.
- No scannable hierarchy. Business book buyers are skimmers by profession. They want bullets, comparison tables, chapter breakdowns, and outcome statements. A paragraph block forces linear reading they will not do.
- No trust transfer. A+ Content modules carry Amazon's own visual chrome — the same layout system used by Penguin, Harper Business, and Wiley. Borrowed credibility, rendered in pixels.
The Conversion Math: 4.2% to 6.1% Is Not Incremental
Let's run the arithmetic that matters. Assume a self-published business book priced at $8.00 royalty per unit (a realistic figure for a $16.99 paperback after print cost and Amazon's 60% cut).
| Metric | Baseline Listing | With A+ Content |
|---|---|---|
| Monthly page views | 1,000 | 1,000 |
| Conversion rate (CVR) | 4.2% | 6.1% |
| Units sold | 42 | 61 |
| Monthly royalty | $336 | $488 |
| Revenue lift | — | +45% |
A 1.9-point CVR gain looks modest on a spreadsheet. It is not. It is a 45% revenue increase on identical traffic. And that is before the second-order effects kick in.
Amazon's ranking algorithm weights conversion rate heavily. Higher CVR signals relevance, which pushes your BSR (Best Sellers Rank) upward in your category. A book that climbs from #48,000 to #12,000 in Kindle Business & Money gets surfaced in more "Customers who viewed this also bought" carousels. Those carousels are free impressions. Free impressions at a 6.1% CVR compound monthly. Run the model forward twelve months and the gap between a text-only listing and an A+ listing is not 45%. It is closer to 3x total royalty.
Preflight reality check: A+ Content modules render at fixed pixel widths — 970px for the standard image header, 300px for the standard four-image grid, 220px for the standard single-image sidebar. Upload a 1,200px asset and Amazon's renderer will downscale it, softening your typography and muddying your diagrams. Export every module asset at exact spec: 970×600 for headers, 300×300 for grid tiles, 220×220 for sidebars. PNG for graphics, JPG at 90% quality for photography.
Perceived Production Value: The Interior Inference
Buyers cannot see inside your book before purchase. They have the "Look Inside" preview — usually the first 10% — and they have your A+ Content. That is the entire evidence set.
This is where the psychology gets interesting. When a shopper sees a clean comparison table, a well-typeset chapter sample rendered as a graphic, and a professional author photo with a credential line, their brain makes an inference it cannot verify: if the outside is this polished, the inside must be too. Behavioral economists call this the halo effect. Publishers call it production value. Either way, it moves units.
The inverse is equally true. A listing with a low-resolution cover, a description block that runs 900 words without a single break, and no visual modules reads as a rough draft. The buyer does not consciously think "this author skipped professional formatting." They simply feel a small friction and click back to the search results. That friction is invisible in your analytics. It shows up only as a CVR that will not climb above 4.5% no matter how much you spend on ads.
For non-fiction specifically — business, self-help, memoir, technical — the inference is sharper. These categories promise a transformation: a system, a framework, a method. Buyers are not purchasing prose. They are purchasing a structured outcome. A+ Content that shows the framework — a diagram of your five-step model, a bulleted list of what the reader will be able to do by chapter nine — converts because it proves the transformation is real and organized.
What This Means for Your Listing Build
Three operational takeaways before we move into the module templates:
- Assume the description is invisible. Write it for the 20% who read it. Design your A+ Content for the 80% who do not.
- Model the CVR delta, not the traffic delta. Doubling ad spend at 4.2% CVR is a losing trade. Moving to 6.1% CVR at flat spend is a 45% royalty gain.
- Match every asset to Amazon's pixel spec. A 970px header rendered from a 970px source is sharp. Rendered from a 2,400px source, it is soft. Soft assets read as amateur, and amateur reads as unedited.
The next section breaks down the seven A+ Content module types that work for non-fiction, with exact dimensions, character limits, and the specific module order that produces the highest CVR on business and self-help titles. Bring your cover file and your chapter outline. You will need both.
Generate 3D Book Mockups & A+ Content Assets in Minutes
Stop paying $500 to graphic designers for generic Canva templates. BooklierAi generates high-converting 3D isometric book mockups, framework diagrams, and complete Amazon launch kits directly from your manuscript.
The Essential Amazon A+ Content Modules & Pixel Dimensions (With Cheat Sheet)
The Essential Amazon A+ Content Modules & Pixel Dimensions (With Cheat Sheet)
A+ Content is not a design exercise. It is a spec sheet. Amazon's module library gives you fixed pixel canvases, and every asset you upload either fits those canvases cleanly or gets cropped, letterboxed, or scaled into mush on a 6-inch phone screen. For self-published business and non-fiction authors, the difference between a polished A+ block and a broken one comes down to five numbers: 970, 600, 300, 220, and 350. Get those right and the rest is copywriting.
Below is the working reference I use when prepping A+ assets for KDP trade paperbacks. Every dimension here reflects Amazon's current module specs. Treat them as hard constraints, not suggestions.
1. Standard Image Header with Text — 970 × 600 px
This is the hero anchor. It sits at the top of your A+ block and occupies the widest visual real estate Amazon allows above the fold. The 970 × 600 canvas renders at roughly a 1.62:1 aspect ratio, which is close enough to widescreen that photography and lifestyle shots read naturally. On mobile, this module scales down to full viewport width, so a 970-pixel-wide source image gets compressed to roughly 360–400 CSS pixels. That compression is where blur happens if your source resolution is too low.
Use it for one thing: a single, high-contrast image that communicates your book's promise in under two seconds. Author photo plus book cover plus a three-word benefit line. Nothing else.
2. Standard Image & Dark/Light Highlights — 300 × 300 px
Square module. The image sits on the left (or right, depending on the variant), and a structured block of title-plus-paragraph text sits beside it. The 300 × 300 image is small — roughly 1.5 inches at print resolution — so avoid fine detail. Icons, single objects, or tight face crops work. Busy infographics do not.
Dark Highlights uses a black background with white text. Light Highlights inverts it. For business non-fiction, Dark Highlights tends to outperform on mobile because the contrast ratio exceeds 15:1, which matters when readers are scanning on a phone in a bright room.
3. Standard Three Images & Text — 300 × 225 px (each)
Three images, three captions, one row. This is the workhorse module for framework pillars. If your book teaches a three-part system — say, Diagnose, Design, Deploy — this is the module that renders it. Each image is 300 × 225 px, a 4:3 ratio. Keep each caption under 200 characters or Amazon truncates on mobile.
4. Standard Four Images & Text — 220 × 220 px (each)
Same logic, tighter grid. Four 220 × 220 squares. This module suits four-phase methodologies, four-step processes, or four audience segments. The smaller canvas means your images must be legible at thumbnail scale. Test every asset at 25% zoom before uploading. If you cannot read it at 55 pixels wide, it will not survive mobile rendering.
5. Standard Comparison Table — 150 × 300 px (column thumbnails)
Portrait-oriented thumbnails. 150 wide, 300 tall. This module exists to compare things: paperback vs. hardcover vs. Kindle, or Book 1 vs. Book 2 vs. Book 3 in a series. The 1:2 ratio is unusual, so most authors crop book covers awkwardly here. The fix is to compose a vertical stack — cover on top, format label below — inside the 150 × 300 frame before upload.
6. Standard Technical Specifications / Single Sidebar — 350 × 350 px
A 350 × 350 image paired with a bulleted attribute list. This is where you put ISBN, page count, trim size (6 × 9 in), publication date, and edition details. It reads as a spec sheet, which is exactly the point. Business book buyers — especially procurement-adjacent readers and bulk purchasers — scan for this module. Give it to them.
Module Cheat Sheet
| Module Name | Exact Pixel Dimensions | Max File Size | Best Use Case | Mobile Rendering Behavior |
|---|---|---|---|---|
| Standard Image Header with Text | 970 × 600 px | < 3 MB | Hero anchor, book promise, author brand shot | Scales to full viewport width (~360–400 px); text overlays reflow below image |
| Standard Image & Dark/Light Highlights | 300 × 300 px | < 3 MB | Single concept, icon, or tight face crop with supporting paragraph | Stacks vertically; image renders above text block |
| Standard Three Images & Text | 300 × 225 px (each) | < 3 MB per image | Three-part framework, three key takeaways | Converts to single-column stack; captions truncate past ~200 characters |
| Standard Four Images & Text | 220 × 220 px (each) | < 3 MB per image | Four-phase methodology, four audience segments | Two-by-two grid collapses to vertical list on narrow viewports |
| Standard Comparison Table | 150 × 300 px (column thumbnails) | < 3 MB per image | Format comparison (paperback/hardcover/Kindle) or series catalog | Horizontal scroll on mobile; first two columns visible without swipe |
| Standard Technical Specifications / Single Sidebar | 350 × 350 px | < 3 MB | ISBN, page count, trim size, edition data, bulleted attributes | Image stacks above bullet list; bullets render full-width |
Resolution and Export Settings: The 72 DPI Myth
Here is the part that trips up almost every self-published author. DPI — dots per inch — is a print metric. It describes how many ink dots a printer lays down per linear inch. On screen, DPI is meaningless. What matters is pixel count. A 970 × 600 image is 970 × 600 pixels whether you tag it 72 DPI or 300 DPI. The file is identical.
So why does Amazon's help documentation mention 72 DPI? Because Amazon's upload pipeline historically assumed web-standard assets and used 72 DPI as a baseline tag. It does not change how the image renders. What changes rendering is the raw pixel count relative to the display size.
Here is the practical rule: export at 2× the module dimensions, then let Amazon downscale. For the 970 × 600 header, that means exporting at 1940 × 1200 px. For the 300 × 300 module, export at 600 × 600. For the 220 × 220 grid, export at 440 × 440. Amazon's CDN handles the downscaling server-side, and downscaling always produces sharper results than upscaling.
Export recipe for razor-sharp A+ assets:
- Build your canvas at 2× the target module size (e.g., 1940 × 1200 for the header).
- Set export resolution to 300 DPI in Photoshop, Affinity Photo, or GIMP. This tags the file correctly for Amazon's pipeline.
- Export as JPEG at quality 85–90, or PNG-24 if the image contains text or flat color fields. JPEG artifacts around text edges are visible on Retina displays.
- Verify file size is under 3 MB. If a 1940 × 1200 PNG exceeds 3 MB, switch to JPEG at quality 88.
- Preview the asset at 50% zoom on a phone-sized viewport before upload. If text is unreadable, rebuild it larger.
The 2× export strategy matters most for the header module. A 970 × 600 JPEG exported at 72 DPI will look acceptable on a desktop monitor and noticeably soft on an iPhone 15 Pro, which packs roughly 460 pixels per inch into its display. A 1940 × 1200 export downscaled by Amazon to 970 × 600 renders crisp because the source had twice the pixel density to work with.
Common failure modes to avoid:
- Uploading a 970 × 600 image with baked-in text smaller than 24 pt. It becomes illegible at mobile scale.
- Using PNG-8 for images with gradients. Banding appears in the header module.
- Exceeding 3 MB. Amazon rejects the upload silently or throws a generic error.
- Composing the comparison table thumbnails at landscape orientation. The 150 × 300 frame will crop the sides.
Build every asset against these specs once, save them as a reusable template in your design tool, and you will never fight Amazon's upload pipeline again. The modules are fixed. Your job is to fill them with precision.

The 5-Module Winning Stack for Business & Self-Help Books
The 5-Module Winning Stack for Business & Self-Help Books
Amazon gives you up to seven module slots on a standard A+ Content page. Most self-published business authors fill all seven with redundant banners and call it a day. That wastes the single most valuable real estate on your detail page. The stack below uses five modules in a fixed sequence, each one answering the exact objection the previous module creates in the buyer's mind. This is the layout I've used across dozens of business, leadership, and self-help titles, and it consistently outperforms the "more is better" approach because every module has a job.
The sequence matters more than the individual assets. A buyer scrolls top to bottom. Module 1 stops the scroll. Module 2 makes them believe the book contains a system. Module 3 proves the system exists on actual paper. Module 4 answers "who is this person and why should I trust them." Module 5 removes the last friction point — format confusion or the "should I buy the workbook too" question. Break the order and you leak conversions at every step.
Module 1: The Visual Hook & Core Promise (970 x 600 px)
This is your only shot at the first three seconds. The 970 x 600 px standard image module renders at roughly 3.2:1 on desktop and stacks taller on mobile, so design for the center safe zone and keep critical text away from the outer 40 px on every edge.
Composition rules that hold up in A/B tests:
- Headline: 6–9 words maximum, set in a heavy sans-serif at 48–64 pt equivalent. It states the outcome, not the topic. "Build a Sales Team That Closes Without You" beats "A Guide to Sales Management."
- Target reader callout: A single line directly under the headline identifying exactly who the book is for. "For founders, executives, and consultants scaling past $1M." Specificity converts. Generic "for anyone who wants to grow" copy repels serious buyers.
- Value proposition: One supporting sentence, 12–18 words, naming the mechanism or timeframe. "The 90-day operating system that replaces founder bottleneck with repeatable process."
- 3D book mockup: Place the cover at a 15–20 degree angle on the right third of the canvas. Use a real spine wrap, not a flat cover pasted onto a template. Shadows should fall consistently with the light source across the whole banner.
Copy framework: [Outcome headline] + [Who it's for] + [Mechanism or timeframe] + [Book mockup]. Four elements, nothing else. Every additional word drops the read-through rate.
Module 2: The Proprietary Framework / Diagram (970 x 300 px or 970 x 600 px)
Buyers of business books do not buy information. They buy a system they can run on Monday morning. Module 2 exists to prove you have one. This is where you visualize your core methodology — The 4-Step Flywheel, The Profit Engine, The Leadership Ladder, whatever you've named it.
Use the 970 x 300 px banner if your framework is a linear 3–5 step process. Use the 970 x 600 px module if it's a circular model, a matrix, or a diagram with more than five nodes. The taller canvas gives you room for labels without shrinking type below the 18 px legibility floor on mobile.
Diagram discipline:
- Name the framework. Proprietary names create perceived value. "The Revenue Architecture Model" outperforms "our process."
- Number the steps. Buyers scan for sequence. Unnumbered diagrams read as decoration.
- Keep labels to 3–5 words each. "Diagnose the constraint" not "The first phase where you identify the primary operational bottleneck."
- Use one accent color. Two maximum. Diagrams that look like org charts from 2009 get scrolled past.
The framework module is also where you plant the seed for the workbook or companion product. If your diagram has a step labeled "Run the 12-point audit," the buyer now wants to know what that audit looks like. Module 3 answers that.
Module 3: "Inside the Book" Spread Preview (Three Images 300 x 225 px or Four Images 220 x 220 px)
This module does the heaviest lifting in the entire stack. It converts skepticism into confidence because it shows actual pages, not marketing renders. Business book buyers have been burned by 180-page books that repeat one idea. Interior spreads prove tactical substance.
Choose your layout based on what you're showing:
| Layout | Dimensions | Best For |
|---|---|---|
| Three-image row | 300 x 225 px each | Wide spreads, tables, two-page diagrams |
| Four-image grid | 220 x 220 px each | Checklists, worksheets, single-page frameworks |
What to photograph or export from your InDesign file:
- A diagnostic workbook page with fill-in fields. Shows the reader will do work, not just read.
- A summary table — the kind that compresses a chapter into a reference page. Signals reusability.
- A checklist or scorecard. These are the pages readers photograph and share, which drives word of mouth.
- A dense body-text spread with a callout box. Proves the book has real prose, not just graphics.
Export interior spreads at 300 DPI minimum and strip any crop marks or InDesign slug data before uploading. Amazon's image processor will reject or auto-crop files with visible printer marks, and a rejected module stalls your whole A+ submission.
Module 4: Author Authority & Credibility Card (300 x 300 px + Text)
Non-fiction buyers purchase the author as much as the book. This module pairs a single 300 x 300 px portrait with a text block that establishes why you're qualified to write the thing they're about to buy.
Portrait specs and composition:
- Professional headshot, shoulders up, shot against a neutral background. No conference lanyards, no cropped group photos.
- Eye contact with the camera. Direct gaze lifts perceived trustworthiness in every heatmap study I've reviewed.
- Square crop, face centered, top of head with 8–12% headroom. Faces cropped at the chin read as amateur.
The text block follows a four-line structure:
- Credential line: "Founder of [Company], advisor to [recognizable clients]." Named companies do more work than adjectives.
- Track record: One sentence with a number. "Built and exited two companies, advised 140+ founders."
- Client portfolio: A short list of logos or named organizations if you have permission. Three to six names is enough.
- Mission statement: One sentence on why you wrote the book. This is the emotional close before the comparison table.
Module 5: Book Comparison or Companion Matrix (Standard Comparison Table)
The final module removes purchase friction. Two configurations work, and you pick based on your catalog.
Configuration A — Format comparison. Compare Paperback vs Kindle vs Audiobook across rows like price, portability, bonus content, and delivery time. This is the right choice for a standalone title. It answers "which version should I buy" without forcing the buyer to open a new tab.
Configuration B — Companion matrix. Cross-sell the main book against your workbook, masterclass, or template pack. Rows show what each product contains; columns show which buyer need each one solves. This is the higher-revenue play if you have a product ladder.
| Row Label | Paperback | Kindle | Audiobook |
|---|---|---|---|
| Price | $24.99 | $9.99 | $19.99 |
| Bonus content | Workbook appendix | Linked templates | Author commentary |
| Best for | Working through the system | Fast reference | Commute learning |
Keep the table to four rows maximum. Amazon's mobile rendering collapses wide tables into stacked cards, and anything past four rows turns into a scroll wall that kills the close.
Stack all five modules in this order and you've built a detail page that walks a skeptical executive from "what is this" to "which format do I want" in under ninety seconds of scrolling. That sequence — hook, system, proof, trust, close — is the entire conversion engine. Everything else on the page is decoration.

Amazon KDP A+ Content Submission Guidelines & Banned Elements
Amazon KDP A+ Content Submission Guidelines & Banned Elements
Amazon's A+ Content moderation engine is not a suggestion box. It is a rules-based filter, and it rejects roughly one in four first-time submissions from self-published authors. The rejection email rarely tells you which line failed. It gives you a generic "content does not comply with our guidelines" notice and a 24-to-72-hour re-review clock. For a business book launching on a Tuesday with a BookBub promotion already paid for, that delay costs real money.
This section gives you the exact rejection triggers, the copy that survives review, and the preflight pass you should run before you ever click Submit.
The Six Automatic Rejection Triggers
Amazon's A+ Content Policy for Books lists dozens of rules, but in practice, six categories account for the overwhelming majority of rejections on non-fiction business titles. Learn these cold.
1. Customer Review Quotes
You cannot quote an Amazon customer review inside A+ Content. Not in a testimonial module. Not paraphrased. Not with the reviewer's name redacted. Amazon treats customer reviews as platform-owned content, and pulling them into your marketing modules creates a circular dependency the moderation team blocks outright.
What you can do: cite editorial reviews and named industry peers. A quote attributed to "Sarah Chen, CFO at Meridian Logistics" with a verifiable title is compliant. A quote from "Forbes" is compliant if the review actually ran in Forbes. Fabricated attributions get your entire A+ submission flagged and can trigger an account-level review.
| Rejected Copy | Compliant Approved Copy |
|---|---|
| "★★★★★ 'Best business book I've read this year' — Amazon Customer" | "'A disciplined framework for operators who hate fluff.' — Marcus Webb, VP of Operations, Halden Supply Co." |
| "Readers call this 'the definitive guide'" | "Featured in Inc. Magazine's 2025 Reading List for Founders" |
2. Pricing and Promotional Claims
Any language that references price, discount, or bundled value is banned. This includes the soft stuff authors think is safe. The moderation filter scans for these tokens:
- "cheap," "affordable," "budget-friendly," "low-cost"
- "free shipping," "free bonus," "bonus included"
- "on sale," "discount," "50% off," "limited-time price"
- "value-packed," "worth every penny," "priced to sell"
Amazon controls pricing display. Your A+ modules are for product education, not sales pressure. The moment you imply a deal, you are competing with Amazon's own pricing engine, and the filter kills it.
Preflight check: Run a find-and-replace across your A+ copy for the tokens above. Replace "affordable" with "practical." Replace "bonus included" with "includes a companion worksheet." The second version describes a deliverable, not a discount.
3. Time-Sensitive Language
Words that date your content get rejected because Amazon cannot verify when your module will render. A module approved in March that says "new for 2026" looks stale by July. The filter blocks:
- "new," "newly released," "just published," "hot off the press"
- "latest release," "newest edition," "2026 edition"
- "available now," "launching this month"
Replace temporal claims with evergreen positioning. "New for 2026" becomes "Built for the current operating environment." "Just published" becomes "A field-tested playbook." The content stays accurate for years.
4. Competitor Mentions
You cannot name a competing author, book title, or publisher in a pejorative or comparative context. "Unlike [Competitor Book], this doesn't waste your time" is an automatic rejection. So is "Better than [Author Name]'s approach."
Comparative positioning is allowed only when it is neutral and factual, and even then, most authors skip it. The safer play: describe your methodology on its own terms. Let the reader draw the comparison.
5. External Links and Contact Details
Amazon wants shoppers to stay on Amazon. Any element that routes traffic off-platform is banned:
- Full URLs (yourbook.com, yoursite.com/worksheet)
- Email addresses (contact@yourauthorname.com)
- Phone numbers
- QR codes, even if they point to an Amazon page
- Social handles (@yourauthor on any platform)
If you want to offer a downloadable worksheet, host it behind a link inside your book's back matter, not in A+ Content. The A+ module can say "Includes a companion worksheet — see Chapter 12 for access details." That is compliant. A QR code is not.
Preflight check: Zoom your module images to 200% and scan for embedded text. Authors frequently bake a website URL into a lifestyle photo without realizing the moderation team reads every pixel. A 12-point URL in the corner of a stock image will fail review.
6. Trademark Violations
You cannot use Amazon-owned marks without written permission. That includes:
- The Amazon smile logo, in any color or crop
- "#1 Best Seller" badges or orange bestseller ribbons
- "Amazon's Choice" tags
- Kindle branding, Kindle Unlimited badges, or Audible logos
- "Available on Amazon" phrasing that mimics Amazon's own UI
You also cannot use third-party trademarks you do not own. If your book references a proprietary framework from another company, you need written permission or you need to genericize the reference. "The [Brand Name] Method" becomes "the three-stage diagnostic method."
The 15-Minute Preflight Protocol
Before you submit any A+ module, run this sequence:
- Token scan. Search your copy for the banned word lists above. Fix every hit.
- Image audit. Open every asset at 200% zoom. Check corners, backgrounds, and embedded signage for URLs, logos, and QR codes.
- Attribution verification. For every quoted person, confirm the title is current and verifiable via a public source. If you cannot verify it in 60 seconds, cut the quote.
- Link sweep. Confirm zero off-Amazon destinations exist in copy or imagery.
- Trademark check. Confirm no Amazon marks and no unlicensed third-party marks appear anywhere in the module.
This protocol takes 15 minutes per module. It saves you the 72-hour rejection cycle, which for a self-published business book with paid traffic running against it, is the difference between a launch that compounds and a launch that stalls.
The authors who treat A+ Content as a compliance exercise rather than a creative one ship faster, get approved on the first pass, and keep their conversion modules live through the entire launch window. That is the operational edge. Everything else is noise.
Designing 3D Book Mockups & Visual Assets Without Expensive Designers
Designing 3D Book Mockups & Visual Assets Without Expensive Designers
Freelance book mockup designers charge $500 to $1,000 for a five-asset pack. That's a hard pill when your royalty on a $16.99 paperback is roughly $4.50 after print costs. You'd need to sell 111 to 222 copies just to break even on the graphics. For self-published business authors running lean, that math kills the launch budget before the first ad dollar gets spent.
Here's the reality: you don't need a designer. You need to understand four production principles and own the right tooling. Everything else is execution.
Principle 1: 3D Isometric Renders Beat Flat Covers Every Time
A flat 2D cover image on an Amazon listing reads as amateur. The buyer's eye has been trained by 20 years of Apple product pages and DTC brand launches. They expect dimensionality. Three render types do the heavy lifting:
- Hardcover with dust jacket: Show the jacket slightly offset from the boards, with a visible 2-3mm lip at the bottom edge. This signals premium production value. Business and self-help buyers associate hardcover with authority.
- Paperback with spine curl: A subtle 4-6 degree curl on the spine edge, plus a faint highlight running down the curve. This is what a real 250-page paperback looks like when photographed at a 15-degree angle. Flat paperbacks look like PDFs. Curled paperbacks look like books.
- Tablet mockup combos: Place the 3D book next to a tablet displaying an interior spread or a Kindle render. This communicates format versatility. For business books, it also implies "this works as a reference you'll return to."
Render at 2400 x 2400 pixels minimum. Amazon's A+ modules accept up to 3000px on the long edge, but 2400 gives you headroom for retina displays without bloating the file past the 2MB per-image cap.
Principle 2: Drop Shadows & Ambient Occlusion Separate Pro From Cheap
Flat covers with no shadow look pasted onto the background. The human visual system reads shadows as depth cues. Remove them, and the brain flags the image as fake. That microsecond of distrust costs conversions.
Two shadow layers matter:
- Contact shadow: A tight, dark shadow directly beneath the book where it meets the surface. Opacity 40-60%, blur radius 8-12px, offset 0px vertical. This anchors the book to the "floor."
- Ambient occlusion: A wider, softer shadow that wraps around the spine and bottom edge. Opacity 15-25%, blur radius 40-60px, offset 15-25px. This mimics how light behaves in a real room.
Skip the harsh drop shadow presets in Canva. They're too uniform and too dark. Real shadows have falloff. If you're working in Photoshop or Affinity Photo, build the shadow on a separate layer, then apply a Gaussian blur and reduce opacity until it reads as "suggested" rather than "drawn."
Preflight check: Export mockups as sRGB JPEG at quality 85-90. Amazon's A+ backend strips embedded ICC profiles on upload. If you export in Adobe RGB, colors will shift muddy on mobile. Convert to sRGB before export, every time.
Principle 3: Color Palettes Must Match the Cover, Not Your Mood Board
Your A+ Content background tones need to pull directly from the book cover's primary and accent colors. Not close. Exact hex matches.
Here's the workflow. Open your final cover PDF in Photoshop. Use the eyedropper to sample three colors: the dominant background tone, the primary title color, and one accent (usually a rule line, icon, or subtitle highlight). Write down the hex values. Those three colors become your A+ Content palette.
| Cover Element | A+ Usage | Hex Example |
|---|---|---|
| Dominant background | Module background fill | #1B2A4A (navy) |
| Title color | Headline text in image assets | #F5F0E8 (cream) |
| Accent (rule/icon) | Callout borders, bullet markers | #C9A84C (gold) |
When the A+ page and the cover share a palette, the listing feels like one cohesive product. When they clash, the buyer's brain registers "two different things" and trust drops. This is basic brand consistency, and it's free to execute.
Principle 4: Typography in Images Must Survive a 5-Inch Screen
This is where most authors fail. They build a beautiful 3000px-wide comparison chart with 14pt body text. On a desktop monitor, it reads fine. On a phone — where 70%+ of Amazon browsing happens — that 14pt text renders at roughly 4-5px tall. Illegible.
The rule: any text embedded in an A+ image must be 28pt minimum at final export size. For headline or display copy, go 36-48pt bold. For supporting labels, 28-32pt semibold. Never lighter than regular weight.
Mobile legibility formula:
Minimum pt size = (image width in px / 3000) x 28
Example: 1500px wide image → (1500/3000) x 28 = 14pt minimum
But 14pt is the floor. Aim for 32pt+ to stay readable at thumbnail scale.
Use high-contrast pairings. Dark text on light backgrounds or light text on dark backgrounds. Mid-tone on mid-tone disappears on phone screens in bright ambient light. And avoid thin serif fonts below 36pt — the strokes break apart at small render sizes.
How BooklierAi Eliminates the Entire Production Bottleneck
Every asset described above — the isometric hardcover render, the curled paperback, the tablet combo, the shadow layers, the palette-matched backgrounds, the mobile-safe typography — gets generated automatically when BooklierAi produces your book file.
You don't open Photoshop. You don't hunt for hex codes. You don't export at the wrong resolution and discover it three days later when Amazon rejects the module.
The system outputs a complete 3D marketing suite: front-facing hero render, angled paperback with spine curl, hardcover with dust jacket, tablet-plus-book combo, and a social mockup pack sized for Instagram (1080 x 1080), Facebook (1200 x 630), and Pinterest (1000 x 1500). All rendered at 2400px minimum, all sRGB, all under the 2MB A+ cap.
For authors running amazon a plus content self published business books, this collapses a $500-$1,000 line item and a 2-3 week turnaround into a byproduct of publishing. You upload the book, you get the assets. That's the entire workflow.
The visual quality gap between "author who paid a designer" and "author who used BooklierAi" is zero. The budget gap is $1,000. Spend that on ads instead.
A/B Testing A+ Content with Amazon Manage Your Experiments (MYE)
Amazon A+ Content A/B Testing with Manage Your Experiments (MYE)
Amazon's Manage Your Experiments tool is the only native split-testing engine that touches the actual buy box. No third-party plugin, no external heat-mapping subscription, no guessing. MYE rotates two versions of your A+ Content module stack in front of live shoppers and reports a winner with statistical confidence. For self-published business book authors, this is the closest thing to a controlled lab experiment you will ever get on retail traffic.
But MYE is not a toy. It has hard eligibility gates, minimum runtime windows, and a sample-size math problem most authors ignore. Get the mechanics right and you can pull a 1.2% conversion rate (CVR) lift that compounds into five figures over a book's sales life. Get them wrong and you burn 10 weeks chasing noise.
Eligibility: You Need Traffic Before You Need Testing
MYE only unlocks on ASINs with enough weekly unit velocity to generate a statistically usable sample. Amazon does not publish a fixed threshold, but the practical floor observed across KDP accounts sits around 50–100 weekly units per ASIN. Below that, the tool either stays greyed out or your test runs for months without reaching significance.
Two hard requirements before you start:
- Brand Registry enrollment. MYE lives inside Brand Registry. If your book is not tied to an approved brand, the Experiments tab does not exist for you.
- Published A+ Content on the live detail page. You cannot test against a blank page. Both Version A and Version B must be fully submitted and approved modules.
If your ASIN is under the velocity floor, do not force it. Run a price promotion, a category ad push, or a BookBub feature first. Build the traffic base, then test.
Structuring a Statistically Valid Test
MYE splits traffic 50/50 between two variants and runs until Amazon's model detects a winner at 95% confidence (or you hit the maximum window). Your job is to isolate one variable per test. Two variables at once and you learn nothing about which one moved the needle.
Three test structures that work for non-fiction business books:
| Test | Version A | Version B | Primary Metric |
|---|---|---|---|
| Framework vs. Authority | Methodology stack, process diagrams, "how it works" modules | Author bio, press logos, reader testimonials, endorsements | Conversion rate |
| Hero Banner Headline | "The Definitive Playbook for SaaS Founders" | "How to Scale from $10k to $100k MRR Without VC Funding" | Units sold |
| Comparison Module | Your book vs. 3 competing titles | Your book vs. "doing nothing" (cost of inaction) | Conversion rate |
The headline test is the highest-leverage one for business books. Version A sells identity ("I am a SaaS founder"). Version B sells outcome ("I will hit $100k MRR"). Outcome headlines consistently beat identity headlines in the self-help and business category because they answer the buyer's real question: what changes after I finish chapter one?
Sample Size and Duration: The 8-to-10 Week Rule
Amazon does not expose a sample-size calculator, so run the math yourself. For a book converting at 8% CVR, detecting a 1.2 percentage point lift (8% → 9.2%) at 95% confidence and 80% power requires roughly 4,000–5,000 impressions per variant. That is 8,000–10,000 total detail page views.
At 300 weekly detail page views, you need 27–33 weeks. At 1,500 weekly views, you need 6–7 weeks. Most viable business book ASINs land in the 8-to-10 week window. Amazon will often auto-stop the test earlier if the signal is strong enough.
Metrics That Actually Matter
MYE reports four numbers. Two of them drive decisions.
- Units sold. The raw count. Useful for sanity-checking, useless for comparing variants of different lengths.
- Conversion rate delta. The percentage-point change between A and B. This is your decision metric.
- Sales revenue. Total dollars during the test window. Confounded by price changes, ads, and seasonality. Do not use it as your primary signal.
- Confidence level. Amazon's own statistical read. Below 95%, treat the result as inconclusive.
Track CVR delta as the winner-determiner. Everything else is context.
Scenario: What a 1.2% CVR Lift Is Worth
Assume your book sells at $14.99 retail with a $6.20 royalty per unit (70% minus print cost on a 220-page 6x9" paperback). Baseline CVR is 8.0% on 1,200 weekly detail page views.
- Baseline weekly units: 1,200 × 0.080 = 96 units
- Post-test weekly units: 1,200 × 0.092 = 110.4 units
- Weekly delta: 14.4 units
- Weekly royalty delta: 14.4 × $6.20 = $89.28
That looks modest until you extend the horizon. Over a 3-year book lifecycle at flat traffic:
- Annual royalty delta: $89.28 × 52 = $4,642.56
- 3-year cumulative delta: $13,927.68
Now layer in compounding. Higher CVR improves your Best Sellers Rank velocity, which feeds organic placement, which raises weekly detail page views. A 1.2% CVR lift that pushes weekly views from 1,200 to 1,500 turns the same math into roughly $17,400 over three years. One test. One winning headline. That is the entire case for MYE.
What to Do With a Winner
When MYE declares a winner, the losing variant is archived automatically. Your winning modules stay live. Do not immediately launch a new test against the winner. Wait 30 days, let the CVR stabilize, then test the next variable down the stack: comparison module, testimonial placement, or the CTA copy inside your closing module.
For authors running Amazon A+ Content for self-published business books, MYE is the difference between designing by taste and designing by data. Taste gets you a good-looking detail page. Data gets you a detail page that pays rent.
Case Study: How an Amazon Listing with A+ Content Generated $68,000 in Consulting Pipeline
Case Study: How an Amazon Listing with A+ Content Generated $68,000 in Consulting Pipeline
Marcus runs a boutique operational excellence practice out of Charlotte. Fifteen years in supply chain management, two former Fortune 500 clients on retainer, and a 140-page paperback he published through KDP titled The 90-Day Operations Audit. The book was good. The listing was not.
For the first seven months, his detail page was a wall of plain text. Title, subtitle, a 4,000-character description with line breaks every three sentences, and a stock author photo. No A+ Content. No comparison table. No visual proof that the man behind the book had actually run the audits he was writing about.
The numbers told the story. Roughly 660 monthly detail page sessions, a 3.8% conversion rate, and 25 paperback sales per month at $24.99. That is $624.75 in monthly royalty at the 60% rate ($14.99 per copy). Respectable beer money. Not a consulting pipeline.
The Baseline Economics
| Metric | Pre-A+ (Monthly) | Post-A+ (Monthly) |
|---|---|---|
| Detail page sessions | 660 | 1,590 |
| Conversion rate | 3.8% | 6.9% |
| Paperback units sold | 25 | 110 |
| Royalty per unit | $14.99 | $14.99 |
| Monthly royalty | $374.75 | $1,648.90 |
Two forces moved those numbers. The A+ Content lifted conversion from 3.8% to 6.9% — an 81.6% relative gain, squarely inside the 20-30% lift band Amazon documents for well-built modules, with the extra push coming from the QR-code companion asset. The impression volume nearly doubled because higher conversion feeds Amazon's ranking algorithm, which feeds organic placement, which feeds more sessions. Compounding, not linear.
What He Actually Built
Marcus deployed the 5-Module Winning Stack covered earlier in this article. Three specifics mattered most for the consulting funnel:
- Module 1 — Isometric 3D mockup. A 970 × 600 px hero image showing the paperback at a 35-degree rotation with a subtle drop shadow, next to a tablet displaying the companion dashboard. Built in Canva, exported at 72 DPI, file size 187 KB. Under the 2 MB ceiling with room to spare.
- Module 3 — Framework diagram spread. A 970 × 300 px three-panel image showing the book's core audit framework: Diagnose, Prioritize, Execute. Each panel carried a small QR code (1.2 cm printed size, minimum 0.8 cm for reliable scan) linking to a gated Notion page.
- Module 5 — Comparison grid. A 970 × 600 px table positioning The 90-Day Operations Audit against three competing titles on page count, downloadable tools, and template library access.
Total production time: 11 hours across four evenings. Total cash outlay: $0. He owned the diagrams from his consulting decks already.
The QR Code Companion Vault
This is where the pipeline actually formed. The interior of the book — page 47, right-hand recto, 0.75" bottom margin — carries a QR code printed at 300 DPI. It resolves to a landing page with a single email field and one offer: Download the 12-Point Operations Audit Assessment (PDF, 14 pages).
Of the 110 monthly paperback buyers, 38% scanned the code. That is 42 scans per month. Of those 42, 31 completed the email capture (a 74% completion rate — high because the offer is specific and the buyer already paid $24.99, so intent is qualified).
From Impression to Closed Retainer
Here is the full chain, end to end:
- Amazon impression: 1,590 monthly detail page sessions.
- Conversion: 6.9% → 110 paperback sales.
- QR scan: 38% → 42 scans.
- Email capture: 74% → 31 leads.
- Executive qualification: 42 over 90 days.
- Discovery calls booked: 9 (21% of qualified leads).
- Proposals sent: 4.
- Retainers closed: 2.
- Contract value: $68,000 combined ($41,000 and $27,000, both 6-month engagements).
The book itself generated $1,648.90 in monthly royalty at peak. Over the same 90-day window, that is roughly $4,947 in book revenue against $68,000 in consulting revenue. The book is not the product. The book is the lead magnet that happens to pay for itself.
What This Means for Your Listing
If you publish business non-fiction and you are not running A+ Content with a companion asset funnel, you are leaving two revenue streams on the table: the conversion lift on the book itself, and the pipeline the book should be feeding. The 5-Module Stack takes a weekend to build. The QR code takes an afternoon. The math above is not theoretical — it is a 140-page paperback with a $24.99 price point and a consultant who finally treated his Amazon listing like the front door of his practice instead of a bookshelf.
Build the modules. Print the code. Capture the lead. The book pays for the book. The pipeline pays for everything else.
Step-by-Step A+ Content Publishing Checklist & Pre-Launch Protocol
Step-by-Step A+ Content Publishing Checklist & Pre-Launch Protocol
You have the modules mapped, the 970×600 hero image exported at 2x, the alt-text drafted. None of it converts until it clears KDP's review queue and renders correctly on a 5.5-inch phone screen. This is the operational sequence that separates a live A+ module from a rejected draft sitting in your dashboard for eleven days.
Follow all eight steps in order. Skipping step 5 or step 6 is the most common reason self-published business authors lose 20-30% of their projected lift before the listing even goes live.
Step 1 — Access the A+ Content Console
Sign in to your KDP Bookshelf at kdp.amazon.com. From the top navigation, click Marketing, then A+ Content. If the tab is greyed out, your account is not yet enrolled in the A+ program — enrollment is free and instant for accounts with at least one published title, but approval can take 24-48 hours. Do not submit a support ticket before checking your Bookshelf for a "KDP Select" or "Expanded Distribution" enrollment conflict, which occasionally blocks the Marketing tab from loading.
Step 2 — Select Your Marketplace
Amazon.com is the default and the highest-traffic marketplace for amazon a plus content self published business books. Build your primary project here first. Once approved, use the Duplicate function to clone the project into Amazon.co.uk, Amazon.ca, and Amazon.de. Cross-marketplace duplication preserves module layout but does not auto-translate copy — budget 30-45 minutes per locale for keyword localization, or your German listing will display English alt-text and tank your regional SEO.
Step 3 — Name the Content Project
Use a naming convention that survives six months of A/B testing. Format: Book-Title-A-Plus-Version. Example: The-SaaS-Playbook-A-Plus-V1. When you run a Manage Your Experiments test in month three, you will have The-SaaS-Playbook-A-Plus-V2 sitting beside it in the dashboard. Authors who name projects "My A+ Content" or "Test 1" lose track of which variant won and which assets belong to which version. Version discipline is not optional at scale.
Step 4 — Add Modules and Upload 2x Assets
Drag your selected modules into the canvas. Every image must be uploaded at exactly double the display dimensions to survive Amazon's retina rendering pipeline:
| Module Type | Display Size (px) | Upload Size (px) | Max File Size |
|---|---|---|---|
| Standard Image Header | 970 × 600 | 1940 × 1200 | 2 MB |
| Standard Four Image | 220 × 220 each | 440 × 440 each | 2 MB each |
| Standard Company Logo | 600 × 180 | 1200 × 360 | 2 MB |
| Standard Single Image | 300 × 300 | 600 × 600 | 2 MB |
Export as PNG-24 for graphics with text or sharp edges. Use JPEG at 85% quality for photographic backgrounds. Anything above 2 MB triggers a silent upload failure — the module appears empty and you will not receive an error message until final review.
Step 5 — Populate Image Keywords (Alt-Text)
Every image slot accepts up to 100 characters of descriptive keyword text. This field feeds two systems: Amazon's internal image search index and screen-reader accessibility compliance. Write naturally, front-load the primary keyword, and never stuff. A weak entry reads: "book cover image." A strong entry reads: "SaaS pricing strategy framework for B2B founders, 2024 edition." That second version contains three indexable phrases and reads cleanly to a screen reader. Do this for every single image slot — Amazon's crawler treats missing alt-text as a quality signal penalty.
Step 6 — Apply Both ASINs
This step is where most authors lose half their traffic. In the ASINs field, add both your paperback ASIN (format: B0XXXXXXXX) and your Kindle eBook ASIN. If you only attach the paperback, your A+ Content will not display on the Kindle product page — and Kindle buyers represent 40-60% of total unit volume for most business titles. Both ASINs must be entered, comma-separated, before submission. There is no way to retroactively add an ASIN after approval without resubmitting the entire project and waiting another 7 business days.
Step 7 — Review and Submit
Click Review and Submit. Before you confirm, run the built-in preview on both desktop and mobile viewports. Check for text clipping at the module edges — Amazon's mobile renderer crops 8-12% of horizontal padding on the Standard Image Header. Once submitted, immediately record the submission date and time in a spreadsheet. Approval typically takes 3-7 business days, but Q4 (October-December) stretches to 10-14 days. Log the date so you can escalate if you cross day 8 without a status change.
Step 8 — Monitor Approval and Verify Live Rendering
Check the A+ Content dashboard daily for status changes: Draft → Submitted → Approved or Rejected. On approval, do not trust the dashboard preview alone. Open your book's product page in three environments:
- Desktop Chrome at 1440px width
- Amazon mobile shopping app on iOS
- Amazon mobile shopping app on Android
Confirm every module loads, every image is sharp, and no text is cut off. Mobile rendering failures are the single most common post-approval defect — and they cost you the 60%+ of buyers who never see the desktop page.
Your Listing Is a Storefront, Not a Form
Amazon gives you roughly 970 pixels of horizontal real estate and a buyer's attention span measured in seconds. That is a retail window on the busiest street in the world. Treat the eight steps above as your pre-opening inspection — because a rejected module, a missing Kindle ASIN, or a blurry 1x image is the equivalent of leaving your shop lights off during business hours. Build it clean. Submit it once. Verify it everywhere. Then let the conversion math do its work.