Direct Answer: How Do You Calculate a KDP Full-Wrap Cover Size?
A KDP full-wrap cover canvas equals: Overall Width = Bleed (0.125”) + Back Cover Width (6.0”) + Spine Width + Front Cover Width (6.0”) + Bleed (0.125”). Overall Height = Bleed (0.125”) + Trim Height (9.0”) + Bleed (0.125”) = 9.25”. Spine width is strictly calculated as Page Count × Paper Caliper (0.002252” for cream, 0.0025” for white). Spine text is permitted only on books with 79 or more pages.
1. The Anatomy of a KDP Full-Wrap Cover: Bleed, Safety Margins, and Trim Geometry
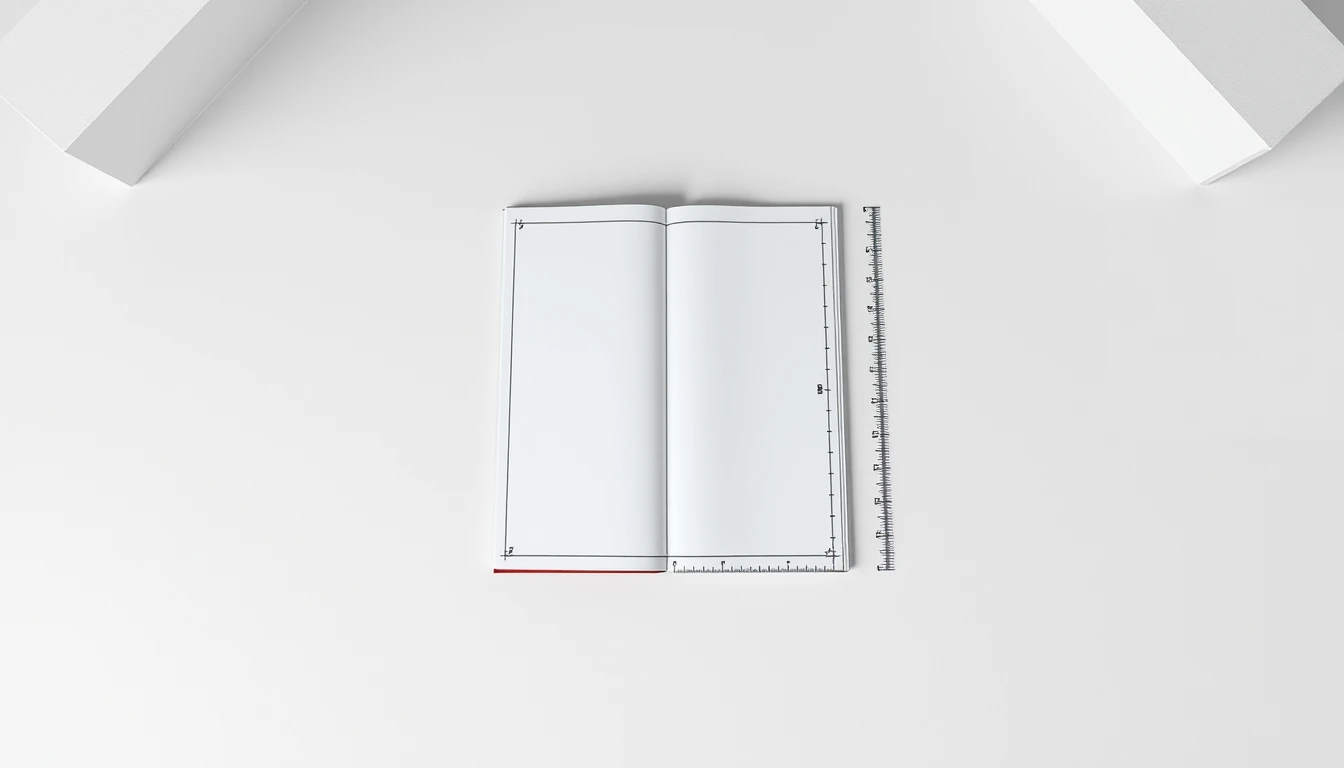
A KDP full-wrap cover template generator outputs a single flat PDF whose width equals 0.125" bleed + 6.0" back cover + spine width + 6.0" front cover + 0.125" bleed, and whose height equals 9.25". Spine width derives from page count and paper caliper. Every element sits inside four nested zones: bleed, trim, safe, and hinge.
Print a paperback cover wrong and the press does not negotiate. The guillotine cuts where the mechanical spec says it cuts, not where your artwork hoped it would. That is why the full-wrap cover is not a design file. It is a manufacturing drawing with type layered on top. Five distinct zones compose that drawing, and each one carries its own tolerance, its own measurement, and its own failure mode.
Zone 1: The Bleed Area
Bleed is the overprint region that extends exactly 0.125" (3.2 mm, or 9 points) past the trim edge on all four outer boundaries of the wrap. On a standard 6x9" book the bleed adds 0.125" to the left edge of the back cover, 0.125" to the right edge of the front cover, 0.125" to the top of both covers, and 0.125" to the bottom of both covers. The spine does not receive bleed because it is interior to the wrap.
Why does the bleed exist? Because guillotine trimming is a mechanical process with real-world drift. A three-knife trimmer on a KDP-adjacent press holds a tolerance of roughly ±0.0625" (1.6 mm) on a good run, and worse on a bad one. If your background artwork stops dead at the trim line, a 1/16" drift leaves a 1/16" white sliver running down the edge of your cover. That sliver is unrecoverable. The book ships. Reviewers photograph it. Returns follow.
The fix is non-negotiable: background artwork, gradient fills, photographic edges, and any element intended to touch the cover edge must extend completely into the bleed zone and stop there. Do not stop 0.10" short. Do not feather to transparent at the trim line. Extend the artwork to the full bleed boundary and let the guillotine cut through solid color. Text and logos, by contrast, never enter the bleed. They live in the safe zone, which we reach in a moment.
A subtle but common error: designers set up a 6.25" x 9.25" canvas for a single cover and assume the wrap is two of those stitched together. It is not. The wrap is one continuous 12.25" + spine width canvas. Backgrounds that run across the spine—a continuous gradient, a horizon line, a repeating pattern—must be built as one object on one canvas, not two objects aligned at the spine seam.
Zone 2: The Trim Line
The trim line is the finished cut boundary. For a standard trade paperback, each cover panel measures 6.0" wide by 9.0" tall. The trim line is where the knife lands. Everything outside it—the bleed—is sacrificial. Everything inside it survives.
Two trim lines exist on the wrap: one around the back cover panel and one around the front cover panel. The spine sits between them. The distance from the left trim line to the right trim line, measured across the spine, is 6.0" + spine width + 6.0". For a 200-page cream-stock book, that interior distance is 12.225". Add 0.25" of combined bleed and the total canvas width is 12.475".
Zone 3: The Safe Zone
Inside the trim line sits the safe zone, offset 0.25" (6.4 mm, or 18 points) from every trim edge. No live text, no logos, no ISBN barcode, no author photograph, no critical graphic element may cross into the 0.25" band between the trim line and the safe zone boundary.
The 0.25" figure is not arbitrary. It is the sum of two tolerances: the press's trim drift (±0.0625" typical, up to ±0.125" worst case) plus a visual breathing margin so that even a perfectly trimmed book does not look cramped. A title set 0.10" from the trim edge may survive one print run and get clipped on the next. A barcode placed 0.15" from the trim edge may scan on the proof and fail on the shelf.
The effective live area on each cover panel is therefore 5.5" wide by 8.5" tall (6.0" minus 0.25" on each side, 9.0" minus 0.25" on each side). Design to that box. Anything outside it is a gamble.
Zone 4: The Spine Area
The spine is centered between the back and front covers, and its width is dynamic. It changes every time page count changes. It changes again if you switch paper stock. There is no fixed spine width for a 6x9" book. There is only a formula.
KDP uses two paper calipers for standard black-and-white printing:
- Cream paper: 0.002252" per page (per leaf, not per sheet)
- White paper: 0.0025" per page
Spine width equals page count multiplied by caliper. Because a "page" in KDP's page count is one printed side, and a leaf has two sides, the practical formula for a saddle-stitched or perfect-bound book is:
Cream example (200 pages):
200 × 0.002252" = 0.4504"
White example (200 pages):
200 × 0.0025" = 0.5000"
Round to three decimals in your layout file. KDP's own template generator rounds to two decimals, which is fine for a 200-page book but drifts noticeably past 400 pages. At 600 pages on cream stock, the true spine is 1.3512"; KDP's rounded template says 1.35". That 0.0012" error is harmless. But if you build your cover from a template generated for a 180-page book and then add 40 pages of back matter, your spine is now 0.0901" too narrow—and the wrap will not align.
Two spine rules that catch first-timers:
- Spine text must be centered on the spine's vertical axis, not on the wrap's centerline. Those are the same only when the back and front covers are identical width, which they are—but designers who build the wrap as two separate panels frequently misalign this.
- Spine text must sit inside its own 0.0625" safety margin on both the top and bottom of the spine. A title set flush to the spine's top edge will wrap around the corner when the book is bound.
Zone 5: The Spine Hinges
On either side of the spine sits a 0.0625" (1.6 mm) hinge crease. This is the fold line where the cover board pivots when the book opens. It is not decoration. It is a mechanical clearance zone. Any element placed directly on the hinge will crack, peel, or distort as the book is opened and closed.
Practically, the hinge means the usable design area on each cover panel is reduced by 0.0625" on the spine-side edge. The back cover's live area is not 5.5" wide starting at the left trim line—it is 5.5" wide starting at the left trim line, with an additional 0.0625" clearance on the right side before the hinge. Same for the front cover on its left side. Designers who ignore this end up with a back-cover blurb that visually crowds the spine.
Hinges also matter for color. A wrap that runs a single solid color across the entire spine and both hinges will show a visible tonal shift at the fold on some presses. If your design depends on absolute color continuity at the hinge, plan for it in the proof.
Calculation Card: 200-Page, 6x9" Cream-Stock Book
=====================================
Page count: 200
Paper stock: Cream (0.002252"/page)
Spine width: 200 × 0.002252" = 0.4504"
Canvas width: 0.125" (bleed)
+ 6.000" (back cover)
+ 0.450" (spine)
+ 6.000" (front cover)
+ 0.125" (bleed)
= 12.700"
Canvas height: 0.125" (bleed)
+ 9.000" (trim)
+ 0.125" (bleed)
= 9.250"
Safe zone (per panel): 5.500" × 8.500"
Hinge clearance: 0.0625" each side of spine
Trim drift tolerance: ±0.0625" typical
Final PDF spec: 12.700" × 9.250"
PDF/X-1a, 300 DPI, CMYK
Warning: If you generate a template for a 200-page book and later revise the manuscript to 240 pages, the spine grows from 0.4504" to 0.5405"—a 0.0901" increase. That is enough to shift the front cover artwork 0.09" off-center and to push spine text onto the hinge. Regenerate the template after every page-count change. Do not patch a cover by hand.
Tip: Build your wrap in a vector editor with the bleed, trim, safe, hinge, and spine guides locked on separate layers. Export to PDF/X-1a with the bleed box set to the full canvas. KDP's print pipeline reads the trim box to determine where to cut; if your PDF's trim box is smaller than your artwork, the bleed gets discarded and you ship with white slivers.
Get these five zones right and the cover survives the press. Get them wrong and no amount of typographic craft rescues it. The next section covers how to translate these measurements into a KDP-compliant PDF and how to verify the file before upload.
Generate pixel-perfect, KDP-compliant full-wrap covers and spine wraps automatically
Never suffer a KDP cover rejection or misaligned spine again. BooklierAi calculates exact paper bulk, applies precision bleed geometry, and renders print-ready PDF/X-1a covers in seconds.

2. Spine Width Mathematics: White vs. Cream Paper Caliper and the 79-Page Threshold
Spine width is not a design opinion. It is a physical measurement dictated by the thickness of every individual sheet stacked inside your book block, plus the compression the binding process applies at the hinge. Get it wrong by 0.030" and your cover wrap slides off-center. Get it wrong by 0.080" and the front cover bleeds onto the back, the title on the spine drifts into the fold, and KDP's automated print validation flags the file before a human ever sees it.
Amazon KDP does not let you guess. It publishes a caliper value for each paper stock — the thickness of a single printed leaf — and the spine math flows directly from that number. Below is the exact arithmetic, the exact thresholds, and the exact buffer you must respect.
Paper Caliper Specifications
KDP's print partner uses three primary interior stocks for 6x9" black-and-white and premium-color paperbacks. The caliper (thickness) of each stock depends on paper weight and coating:
| Interior Stock | Ink Type | Paper Weight | Caliper (inches per page) |
|---|---|---|---|
| White | Black | 50 lb | 0.002252" |
| Cream | Black | 55 lb | 0.0025" |
| White | Premium Color | — | 0.002347" |
Notice the spread. Cream is 11.0% thicker per page than standard white (0.0025 ÷ 0.002252 = 1.1101). Premium color white sits between them at 0.002347". That 11% difference compounds brutally across a 400-page manuscript: 0.900" of spine on cream versus 0.811" on white. A cover designed for one stock will not fit the other.
The Spine Calculation Formula
The formula is linear and unforgiving:
Page count here means the total number of printed pages inside the book block — not sheets. A 150-page book uses 75 sheets, printed front and back. KDP counts pages, so you count pages.
Run the math across the three most common manuscript lengths on cream stock:
| Page Count | Stock | Calculation | Spine Width |
|---|---|---|---|
| 150 | Cream 55 lb | 150 × 0.0025" | 0.375" |
| 240 | Cream 55 lb | 240 × 0.0025" | 0.600" |
| 360 | Cream 55 lb | 360 × 0.0025" | 0.900" |
Now the same page counts on standard white 50 lb:
| Page Count | Stock | Calculation | Spine Width |
|---|---|---|---|
| 150 | White 50 lb | 150 × 0.002252" | 0.3378" |
| 240 | White 50 lb | 240 × 0.002252" | 0.5405" |
| 360 | White 50 lb | 360 × 0.002252" | 0.8107" |
The gap between cream and white at 360 pages is 0.0893" — nearly a tenth of an inch. Lay that error onto a full-wrap cover and the spine text shifts almost a full character width off the fold. The book still prints, but it looks amateur at retail.
Building the Full-Wrap Cover Around the Spine
Once you have the spine width, the full-wrap cover dimensions follow directly. For a 6x9" trim with 0.125" bleed on all sides:
For a 240-page cream book with a 0.600" spine, the cover width is:
0.125 + 6.0 + 0.600 + 6.0 + 0.125 = 12.850 inches.
For the same book on white paper (0.5405" spine), the cover width becomes 12.7905". A 0.0595" difference. If you upload the cream cover with a white interior, the spine text migrates off-center by roughly 0.030" on each side — visible to anyone holding the book.
The 79-Page Spine Text Rule
This is not a stylistic preference. It is a mechanical limitation. Below 79 pages, the spine is too narrow to reliably hold legible text through the binding, trimming, and hinge compression process. At 79 pages on cream, the spine measures 79 × 0.0025" = 0.1975 inches. That is the absolute minimum width KDP will accept for spine text. On white 50 lb, 79 pages yields 79 × 0.002252" = 0.1779 inches — which is why some authors report white-paper books failing at 79 pages while cream-paper books at the same count pass. The threshold is 79 pages regardless of stock, but the physical spine width differs, and KDP's automated system reads the page count, not the caliper.
Practical implication: if your manuscript lands at 76 pages, either cut content to keep the spine blank, or add 3–10 pages of front matter (title page, copyright, dedication, epigraph, part divider) to cross the 79-page line and unlock spine text. A 12-page front matter block on a 70-page body produces an 82-page book — spine text now permitted, spine width 0.205".
The 0.0625" Spine Text Safety Buffer
Even above 79 pages, spine text cannot run edge-to-edge across the spine panel. Physical binding introduces variance: the cover wrap can shift by up to 0.030" in either direction during the perfect-binding process, and the hinge crease consumes additional real estate. KDP requires a minimum 0.0625 inch (1/16") buffer on each side of the spine — meaning text and critical imagery must stay 0.0625" away from both the front-cover fold and the back-cover fold.
For a 240-page cream book with a 0.600" spine, the usable text zone is:
That is the maximum horizontal run for your title, author name, or publisher mark. On a 150-page cream book (0.375" spine), the usable zone is 0.375" − 0.125" = 0.250 inches. Tight. On a 360-page cream book (0.900" spine), you get 0.900" − 0.125" = 0.775 inches — comfortable for a full title set in 10–12 pt type.
Worked Example: A 312-Page Cream Novel
Page count: 312. Stock: cream 55 lb. Spine width: 312 × 0.0025" = 0.780 inches. Usable spine text zone: 0.780" − 0.125" = 0.655 inches. Full-wrap cover width: 0.125 + 6.0 + 0.780 + 6.0 + 0.125 = 13.030 inches. Cover height: 9.25 inches. Spine text permitted because 312 > 79. Buffer enforced at 0.0625" on each side. Every number traces back to the caliper.
Change one variable — swap cream for white — and the spine drops to 312 × 0.002252" = 0.7026", the cover narrows to 12.9526", and the usable text zone shrinks to 0.5776". Same manuscript, different physics. The cover file must be rebuilt from scratch.
This is why KDP requires you to lock page count and paper stock before designing the cover. The spine is a derived value, not an input. Treat it that way and your file passes validation on the first upload.
3. The Barcode Safe Zone: Why KDP Overwrites Author Photos and How to Place Elements
Here is the single most common cover-design failure reported in KDP support threads: an author uploads a beautiful back cover, approves the digital proof, orders a printed copy, and discovers a solid white rectangle sitting on top of their author headshot. The photo is gone. So is the pull quote. So is the bulleted list of "What You'll Learn Inside."
Nothing is broken. The file was not corrupted. KDP did exactly what its print engine is programmed to do. It stamped a barcode over your art, and your art was standing in the wrong place.
This section gives you the exact coordinates of that zone, the math behind the clearance buffer, and a workflow that eliminates the problem permanently.
The Barcode Footprint: 2.0" × 1.2"
Every KDP paperback carries a barcode on the lower-right corner of the back cover. The reserved rectangle is fixed and non-negotiable:
| Dimension | Imperial | Metric |
|---|---|---|
| Barcode box width | 2.000" | 50.8 mm |
| Barcode box height | 1.200" | 30.5 mm |
| Offset from bottom trim edge | 0.250" | 6.35 mm |
| Offset from outside trim edge | 0.250" | 6.35 mm |
Those numbers are measured from the trim line, not the bleed line. On a standard 6" × 9" back cover, the barcode's outer edge sits 0.25" in from the right trim and its bottom edge sits 0.25" up from the bottom trim. The occupied block therefore extends from 0.25" to 1.45" vertically, and from 0.25" to 2.25" horizontally as measured inward from the corner.
Add the mandatory quiet zone—the white margin the scanner needs to read the bars cleanly—and the true keep-clear rectangle is larger than the printed box. Plan for 2.25" × 1.45" of dead space, minimum.
Why KDP Overwrites Your File
KDP does not ask permission. When your interior and cover files pass preflight, the print engine composites a generated barcode onto the back cover at the coordinates above. The operation is a hard paste: a filled white rectangle, then the bar pattern, then the human-readable ISBN digits.
There is no alpha channel. There is no blend mode. There is no "send to back." The barcode layer is applied after your artwork is flattened, so anything underneath it is covered completely. A face, a logo, a QR code, a paragraph of body copy—all of it disappears into a white box on the physical book.
Warning — the 0.25" clearance buffer is not optional. Treat the barcode as a 2.0" × 1.2" box plus a 0.25" buffer on all four sides. That gives a protected zone of 2.5" wide × 1.7" tall. Never place text, faces, logos, or high-contrast graphics inside it. Scanner reliability depends on the quiet zone staying white; if your art bleeds into it, the barcode can fail to read at retail, and a failed scan at a bookstore register means a returned book and a chargeback against your royalty account.
The buffer also protects you against trim drift. KDP trims to a tolerance of roughly ±0.0625" (1/16"). If your artwork sits flush against the barcode box with zero margin, a favorable trim shift will not save you—a bad shift will clip your element and crowd the bars. The 0.25" buffer absorbs the worst-case shift twice over.
Mapping the Zone on a Real Cover
Take a 300-page book at 6" × 9" trim on cream stock. Your full-wrap cover width is calculated as:
Full cover width = 0.125" bleed + 6.000" back + 0.676" spine + 6.000" front + 0.125" bleed
= 12.926"
Full cover height = 0.125" bleed + 9.000" trim + 0.125" bleed = 9.250"
On that 12.926" × 9.250" canvas, the back cover occupies the region from x = 0.125" to x = 6.125". The barcode's right edge lands 0.25" inside the back cover's outer trim, so its horizontal band runs from x = 3.875" to x = 5.875". Vertically, it runs from y = 8.875" down to y = 7.675" (measuring from the top of the canvas).
Everything from x = 3.625" to x = 6.125" and y = 7.425" to y = 9.125" is now off-limits. That is roughly 12% of your total back cover area. Design around it before you place a single element, not after.
Two Paths: Amazon's Barcode vs. Your Own
You have a choice, and the choice affects both your file preparation and your retail flexibility.
| Approach | What You Upload | What KDP Does | Best For |
|---|---|---|---|
| KDP-generated (free) | Cover art with an empty white rectangle in the barcode zone | Stamps its own barcode using your assigned ISBN | 99% of self-publishers. Zero cost, zero barcode-file risk. |
| Author-supplied barcode | Cover art with a print-ready barcode image already placed | Detects the barcode and suppresses its own stamp | Publishers who need a price extension, a custom scan path, or a barcode tied to a non-KDP ISBN |
The free route is almost always correct. KDP pulls the ISBN you assigned during setup, generates the bars at the right magnification, and places them inside the reserved box. You leave that rectangle blank in your design file and the engine fills it.
The author-supplied route matters when you need a price extension—the five-digit add-on printed to the right of the main bars that encodes your retail price. Bookstores and some distributors scan that extension to confirm the cover price. If you sell through Ingram, a retail chain, or a campus bookstore that requires price encoding, generate your barcode with the extension included.
To supply your own, follow these rules without exception:
- Generate the barcode from your registered ISBN at 300 DPI or vector. Never upscale a 72 DPI web barcode.
- Place the barcode so its box occupies the same 2.0" × 1.2" footprint, 0.25" from the bottom and outside trim.
- Keep the background pure white (#FFFFFF) across the full 2.5" × 1.7" protected zone. Off-white cream backgrounds can fail a scanner's contrast threshold.
- Do not place any element within 0.25" of the barcode's edges.
- Flatten the barcode into the cover art as a raster or vector layer—never leave it as a linked asset that can drop during PDF/X-1a conversion.
Production tip: Build a reusable template. Create a 2.5" × 1.7" rectangle, fill it pure white, and lock it on its own layer at the exact barcode coordinates. Design everything else around it. Export that template once and reuse it for every title in a series. You will never lose another author photo to an automated stamp.
Verifying Before You Approve
KDP's online previewer renders the barcode overlay, so the digital proof will show you the collision before you pay for a print copy. Zoom to 200% on the lower-right corner of the back cover. If any element touches the white box, fix the source file and re-upload. Do not approve a proof hoping the printer will "figure it out." It will not. The engine stamps the same rectangle every time, on every copy, in every print run.
Order one physical proof anyway. Screen rendering and offset output diverge in ways that matter at 0.25" tolerances, and a $4.00 proof copy is cheaper than a reprint of 500 books with a white rectangle over your face.

4. Spine & Back Cover Typography: Optical Kerning, Vertical Text Alignment, and 4-Sentence Blurbs
The spine is the most under-engineered surface in self-publishing. It is also the only surface a reader touches before deciding to pull the book off the shelf. A 0.5" spine at 300 DPI gives you 150 pixels of horizontal working room. That is less than the width of a typical paragraph indent in a manuscript. Every decision on that strip — typeface, weight, tracking, hinge offset — is a binary pass/fail against legibility at arm's length under fluorescent light.
Back covers fail for the opposite reason. There is too much room, and authors fill it. The result is a wall of 10pt body copy that no retail browser reads. The back cover is not a synopsis. It is a 4-sentence sales argument with a headline and three to five scannable proof points.
Spine Reading Direction and Stack Order
Western trade convention runs spine text top-to-bottom. When the book lies face-up with the front cover to your right, the title reads correctly from the top of the spine downward. UK and US trade publishers follow this. The German, French, and Italian convention runs bottom-to-top, which is why imported paperbacks appear "upside down" on a US shelf. If you are publishing through Amazon KDP for English-language markets, lock to top-to-bottom.
The stack order, from top of spine to bottom, follows a settled hierarchy:
- Title (largest element, set in the cover display face or a close companion)
- Subtitle (optional, 60–70% of title size, often italic or lighter weight)
- Author name (set at 70–85% of title size, typically all caps or small caps)
- Publisher mark or imprint (optional, bottom 0.5", 8–10pt, often a logo lockup)
Do not stack more than four elements. On a 0.5" spine, four elements at 12pt with 4pt leading gaps consume roughly 3.2" of the 9" trim height, leaving 2.9" of breathing room at top and bottom. That is the correct ratio. Crowd it and the spine reads as a barcode rather than a title.
Vertical Centering Math for Spine Text
Spine text is vertically centered against the trim height, not the spine width. The math is straightforward but routinely botched because authors center against the full wrap height instead of the trim.
The horizontal placement of spine text is where optical kerning and hinge allowance intersect. The spine width is not the full 0.5". KDP and Ingram both require a hinge allowance — typically 0.0625" on the front-cover side of the spine — where the cover wraps around the binding. Text must clear this zone or it disappears into the fold on a perfect-bound book.
That 0.370" usable width is the hard ceiling. If your title at 18pt caps does not fit, you have three options: reduce point size, switch to a condensed face, or shorten the title on the spine. You do not expand the text box. You do not shave the hinge. The hinge is structural, not decorative.
Typeface Selection for Sub-0.5" Spines
Thin script fonts and high-contrast Didones (Bodoni, Didot) collapse on spines. At 18pt on a 0.370" strip, the hairlines of a Didone render at roughly 0.5pt — below the threshold where offset lithography reliably holds ink. The result is a title that looks smudged on press and invisible at thumbnail scale.
Use one of two families:
- Bold geometric or grotesque sans — Futura Bold, Montserrat ExtraBold, Inter Bold. Wide counters, uniform stroke weight, survives 300 DPI rasterization and thumbnail compression.
- Condensed serif — Oswald, Bebas Neue, or a true condensed like Trade Gothic Condensed Bold. Gains 15–20% horizontal fit without sacrificing stem weight.
Set tracking (letter-spacing) at +20 to +40 units per 1000 ems for all-caps spine type. Untracked capitals collide visually at small sizes. Do not exceed +60; the title starts to read as a row of isolated letters rather than a word.
Back Cover Architecture: The Hook Headline
The hook headline sits at the top of the back cover, inside the trim safe zone (0.25" from all trim edges, 0.375" from the spine-side edge to clear the hinge). Set it at 24–32pt bold, one to two lines maximum. It addresses the reader's primary pain point in the reader's own language, not the author's.
Weak: "A Comprehensive Guide to Personal Finance"
Strong: "You Earn Enough. You Still Feel Broke. Here's Why."
The second version names the reader's lived experience. The first names the book's category. Category labels belong on the spine and in the metadata, not in the reader's face.
The 4-Sentence Blurb Formula
Four sentences. Not three, not six. Each sentence performs one job, in sequence:
| # | Function | Word Count | Example Opening |
|---|---|---|---|
| 1 | Provocative status quo | 18–28 | "Most freelancers price by the hour because that's what everyone told them to do." |
| 2 | Critical failure mode | 20–32 | "But hourly billing caps your income at the number of hours you can physically work — and it punishes you for getting faster." |
| 3 | Proprietary solution | 22–35 | "Value-Based Pricing for Freelancers replaces the clock with a five-step diagnostic that ties your fee to the client's revenue outcome." |
| 4 | Measurable transformation | 18–30 | "Readers who apply the framework report 2.4x average rate increases within 90 days — without adding a single client." |
Sentence 4 must contain a number. "Transform your business" is not a transformation claim; it is a wish. "2.4x average rate increases within 90 days" is a claim a reader can evaluate and a copywriter can defend.
Bullet Points with Bold Lead-In Tags
Three to five bullets follow the blurb. Each bullet opens with a bold 2–4 word tag, then a colon, then 8–14 words of supporting copy. The tag does the scanning work; the copy does the convincing.
- The 5-Step Diagnostic: A repeatable script for pricing any project in under 12 minutes.
- Rate Increase Templates: Three email scripts tested across 400+ freelance negotiations.
- Client Red Flags: The seven phrases that predict a scope-creep project before you sign.
- Retainer Math: How to convert one-off projects into 12-month predictable revenue.
Author Bio and Headshot Placement
The barcode clearance zone is non-negotiable. KDP reserves a 2.0" × 1.2" rectangle in the lower-right corner of the back cover, 0.25" inset from the trim edge. Nothing — no text, no image, no background gradient that carries meaning — enters that rectangle.
Place the author bio in the lower-left quadrant, aligned to the same baseline as the top of the barcode zone. A headshot, if used, sits immediately left of the bio at 0.75"–1.0" square, top-aligned with the first line of bio text. Bio copy runs 40–70 words, third person, present tense. No headshot is better than a low-resolution headshot; the image must be 300 DPI at final size, or it will print as a soft gray blob.
Run the full back cover at 100% scale on a laser printer before uploading. Fold a blank sheet to the 9" trim and hold it against the print. If the hook headline does not read at arm's length, the blurb does not fit in four sentences, or the bio crowds the barcode, you have not finished the cover. You have finished a draft of it.
5. Step-by-Step Canvas Setup: Vector PDF Export, Color Profiles (CMYK vs RGB), and 300 DPI Preflight
You do not need a $22.99/month Adobe subscription to build a print-ready full-wrap cover. You need arithmetic, a canvas that accepts decimal inches, and a preflight routine that catches the four failures KDP rejects most often. Everything below assumes a 6" x 9" trim paperback. Adjust the numbers, keep the method.
Step 1: Calculate the Full-Wrap Canvas Before You Open Anything
A full-wrap cover is not a front cover. It is one continuous sheet: back cover, spine, front cover, plus bleed on all four sides. KDP requires 0.125" of bleed on the top, bottom, left, and right edges. Get the spine wrong and the whole file comes back.
Spine width depends on page count and paper caliper. KDP cream paper measures 0.002252" per page; white paper measures 0.0025". Spine width = page count x caliper. A 240-page cream book gives you 240 x 0.002252 = 0.54048", which rounds to 0.541".
FULL-WRAP COVER DIMENSIONS — 6" x 9" TRIM, 240 PAGES, CREAM
Spine width = 240 x 0.002252 = 0.54048" → 0.541"
Total width = 0.125" + 6.0" + 0.541" + 6.0" + 0.125" = 12.791"
Total height = 0.125" + 9.0" + 0.125" = 9.25"
At 300 DPI: 12.791 x 300 = 3,838 px wide
At 300 DPI: 9.25 x 300 = 2,775 px tall
Your example canvas of 12.60" x 9.25" (3,780 x 2,775 px) is the correct height but a short width — it corresponds to a spine of roughly 0.350", which fits a 155-page cream book. Run the formula for your actual interior before you commit pixels. A one-page miscount shifts the spine and throws the front cover art off-center by half the error.
Step 2: Set Up the Canvas in Your Vector Tool
Use Affinity Designer ($69 one-time), Inkscape (free, open source), or Scribus (free). All three accept decimal inches and export PDF/X-1a. Create the document at 12.791" x 9.25", then place four guides:
- Left bleed guide at 0.125"
- Back/spine boundary at 6.125"
- Spine/front boundary at 6.666" (6.125 + 0.541)
- Right bleed guide at 12.666"
Keep all text and logos at least 0.25" inside those trim lines. KDP trims to the 6" x 9" rectangle; anything closer than 0.25" risks getting sliced. The spine itself should carry no critical text unless the book exceeds 100 pages, where KDP permits spine text with a 0.0625" safety margin on each side.
Step 3: Understand RGB vs CMYK Before You Pick a Profile
KDP accepts sRGB (or grayscale) files. It does not accept CMYK. The press converts your sRGB to CMYK internally using its own profile, and that conversion is where authors get burned.
RGB has a wider gamut than CMYK. Saturated blues around #0033FF and neon greens around #39FF14 sit outside the CMYK gamut entirely. The press clamps them to the nearest printable value, and what looked electric on your monitor prints as a flat, muddy approximation. The math is unforgiving: a pure RGB green of (0, 255, 0) converts to roughly (75, 0, 100, 0) in CMYK, which prints as a dull olive.
| Color | sRGB Value | Prints As | Practical Fix |
|---|---|---|---|
| Electric blue | #0033FF | Flat navy | Shift toward #1A4D8F |
| Neon green | #39FF14 | Dull olive | Use #5A8F2E or accept the shift |
| Hot magenta | #FF00AA | Muted rose | Drop to #CC3388 |
| Pure black text | #000000 | Rich black (4-color) | Set text to 100% K only |
Black text trap: If you build black body copy from RGB #000000, the press converts it to a four-color black (Cyan, Magenta, Yellow, and Black all mixed). Any tiny misregistration on press turns your crisp text into a fuzzy, color-fringed mess. Set all interior and cover text to pure black — 100% K, zero C/M/Y — so only one plate prints it.
Step 4: Run the Four Preflight Checks
Preflight is not optional. KDP's automated checker rejects files that fail these, and each rejection costs you a 24-72 hour review cycle.
- Resolution — 300 DPI minimum. Every raster element (photos, AI-generated art, textures) must resolve to 300 DPI at final print size. A 1,200 x 1,800 px image placed at 6" x 9" is only 200 DPI and will print soft. Never use 72 DPI web assets. Vector elements — logos, text, rules — are resolution-independent and always pass.
- Fonts — 100% embedded or outlined. Embed every font in the PDF, or convert all text to outlines (vector paths). Outlining is safer: it eliminates any chance of a missing-font substitution on the press. Keep an editable master file with live text so you can fix typos later.
- Flatten transparency. Live alpha channels, layer blend modes, and transparency groups force KDP's RIP to rasterize the affected regions, which can produce banding, halos, or dropped elements. Flatten the file before export. In Affinity, use "Flatten" on the layer stack. In Inkscape, apply Path > Object to Path and merge overlapping shapes.
- Color space — sRGB or grayscale. Do not embed a CMYK profile. Do not use spot colors. Convert the document to sRGB (IEC61966-2.1) as your final step before export.
Step 5: Export PDF/X-1a
PDF/X-1a is the standard KDP wants: it forces all color to CMYK or grayscale, embeds all fonts, and disallows transparency. In your export dialog, select PDF/X-1a:2001, set output intent to sRGB, set compatibility to Acrobat 4 (PDF 1.3), and confirm "Convert to destination" is off — you want your sRGB values preserved, not pre-converted.
After export, reopen the PDF and verify the document properties show the correct dimensions (12.791" x 9.25"), the fonts list shows all embedded, and the color space reads sRGB. If any of those are wrong, fix and re-export. Do not upload a file you have not inspected.
How BooklierAi Automates the Entire Wrap
Every step above is deterministic. That means it can be scripted, and BooklierAi scripts it end to end. You supply the manuscript; the engine:
- Generates the front cover art with AI at 300 DPI or higher, sized to your trim.
- Reads the formatted interior page count and computes spine width from the exact caliper of your selected paper stock.
- Lays out the back-cover blurb, barcode zone (2" x 1.2" clear area at the lower-right), and spine text with correct safety margins.
- Assembles the full wrap at the calculated dimensions, including bleed.
- Exports a certified PDF/X-1a file with embedded fonts, flattened transparency, and sRGB color — in one click.
The math that takes a careful author 40 minutes of guide-placing and preflight-checking takes the engine under 10 seconds, and it never miscounts the spine. You get the print-ready wrap back as a single file, ready to upload to KDP alongside your interior PDF.
Sanity check before every upload: Open the exported PDF, zoom to 400%, and inspect the spine-to-cover seams. If the image crosses the spine boundary cleanly with no white gap and no overlap, your spine width is correct. If you see a sliver of white or a doubled edge, your page count and caliper do not match the file — recalculate and re-export.
6. Frequently Asked Questions: Cover File Rejection, Matte vs. Glossy, and Spine Creep
Cover files fail for arithmetic reasons, not artistic ones. Every rejection email from KDP traces back to a measurement that drifted past a tolerance the printer cannot forgive. Below are the five questions that land in production inboxes most often, answered with the exact numbers you need to fix each one.
1. Why did KDP reject my cover PDF with "Text outside safe margins"?
This error fires when any glyph crosses a boundary the trimmer will cut through. KDP enforces a 0.25" safe zone inside the trim line on all four sides. Text placed at 0.20" from the trim edge looks fine on your monitor and gets guillotined on press.
The two most common offenders:
- Spine text wider than the spine panel. Spine text must sit at least 0.0625" (1/16") from each spine fold. On a 200-page cream-paper book, spine width = 200 × 0.002252" = 0.4504". Subtract 0.125" of clearance and you have 0.325" of usable width for your title. A 14-point font set in a wide serif can easily exceed that.
- Back cover blurb creeping into the trim margin. If your blurb block starts at 0.22" from the bottom trim, the descenders on the last line clip. Move it to 0.375" and the error clears.
Barcode zone: KDP reserves a 2.0" × 1.2" rectangle in the lower-right of the back cover, positioned 0.25" from the trim edges. Do not place text, logos, or images inside it. KDP prints its own barcode there, and your artwork will be overprinted.
Fix procedure: open your cover PDF in Acrobat, enable View → Show/Hide → Rulers, and measure every text block against the trim line. Anything under 0.25" gets moved inward. Re-export at PDF/X-1a and resubmit.
2. Matte vs. Glossy: which finish should I choose?
The finish changes how light behaves on the cover and how the book feels in a buyer's hand. It does not change the print cost. Both options run the same price at KDP.
| Attribute | Matte | Glossy |
|---|---|---|
| Surface feel | Velvety, low-sheen, slightly textured | Smooth, reflective, slick |
| Color saturation | Muted; darks read richer, brights flatten | Vivid; colors pop, contrast increases |
| Fingerprint visibility | High — oils show as smudges | Low — surface wipes clean |
| Scuff resistance | Moderate; edge wear shows as white lines | High; scuffs buff out |
| Best for | Business, memoir, literary fiction, philosophy | Workbooks, cookbooks, children's, technical manuals |
Matte signals seriousness. A 6×9" business paperback with a matte laminate cover reads as a $24.95 hardcover companion. Glossy signals utility. A 300-page cookbook with full-bleed food photography needs gloss to keep tomato reds from going brick-brown.
One production note: matte covers are more prone to "show-through" scuffing during shipping. If your book ships in bulk to retailers, request a matte laminate with a scuff-resistant topcoat, or accept that returns will run 1–2% higher.
3. Can I build a KDP full-wrap cover in Canva?
Yes, with three hard limits you must engineer around.
- CMYK export requires Canva Pro. Free accounts export RGB only. KDP accepts RGB PDFs, but the press converts to CMYK using its own profile, which shifts saturated blues and greens. A #0066CC background can print as a muddy #1A5A99. Pro accounts can export PDF Print with CMYK.
- Pixel rounding breaks spine math. Canva works in pixels, not inches. At 300 DPI, 0.4504" of spine = 135.12 pixels. Canva rounds to 135, introducing a 0.0004" error — negligible. But stack five rounding errors across bleed, trim, and safe zones and you can drift 0.01" off spec. Always set your canvas to exact pixel dimensions: (0.125 + 6.0 + spine + 6.0 + 0.125) × 300 wide, 9.25 × 300 = 2775 tall.
- No dynamic spine calculation. Canva cannot read your interior page count. If you add 40 pages during editing, the spine panel stays the old width and your text wraps onto the front cover. You must manually rebuild the canvas.
Full-wrap canvas (300 DPI, cream paper, 240 pages):
Spine width = 240 × 0.002252 = 0.5405"
Total width = 0.125 + 6.0 + 0.5405 + 6.0 + 0.125 = 12.7905"
Pixel width = 12.7905 × 300 = 3837 px
Pixel height = 9.25 × 300 = 2775 px
4. My page count changed after I designed the cover. Now what?
You rebuild the cover. Spine creep is not cosmetic — it is arithmetic. Spine width scales linearly with page count at 0.002252" per page on cream stock.
| Page Count | Spine Width | Change vs. 200 pp |
|---|---|---|
| 180 | 0.4054" | −0.0450" |
| 200 | 0.4504" | baseline |
| 210 | 0.4729" | +0.0225" |
| 240 | 0.5405" | +0.0901" |
| 300 | 0.6756" | +0.2252" |
A 10-page swing moves the spine 0.0225". That sounds trivial until you realize spine text is centered on the panel. Shift the panel 0.0225" and a title set 0.0625" from the fold now sits 0.040" from it — inside the danger zone. KDP's automated preflight may pass it, but the printed book shows the last letter of your title curling onto the front cover.
Worse: the front and back cover panels shift with the spine. If you designed a full-bleed image that crosses the spine fold, a page-count change misaligns the image by 0.0225" per 10 pages. A 40-page edit throws the artwork 0.09" off — visible as a white sliver along the fold.
Rule: Lock your interior page count before you finalize the cover. If you must edit after cover design, recalculate spine width, rebuild the canvas, and re-place every element. Never stretch or squash the spine panel to fit — that distorts spine text and fails preflight.
5. Does BooklierAi update the cover wrap automatically when I edit chapters?
Yes. This is the core reason authors use BooklierAi instead of assembling files by hand. The interior and cover are generated from the same source document, so the page count drives the spine width in real time.
When you add a chapter, delete a section, or change trim size, the system:
- Recalculates total page count from the typeset interior.
- Recomputes spine width using the correct caliper (0.002252" for cream, 0.0025" for white).
- Regenerates the full-wrap cover at the new dimensions: Width = 0.125 + 6.0 + spine + 6.0 + 0.125, Height = 9.25".
- Re-centers spine text with 0.0625" clearance from both folds.
- Exports PDF/X-1a at 300 DPI with embedded fonts and CMYK color.
You never touch a ruler. You never rebuild a canvas. You edit prose, and the production files stay in spec. That eliminates the single most common cause of KDP cover rejection: a spine that no longer matches the book it wraps.
One caveat worth stating plainly: automatic regeneration assumes you have not manually overridden the cover in an external tool. If you export a cover from Canva, edit it in Photoshop, and re-upload it, BooklierAi treats it as a static asset and stops syncing. Keep the cover inside the platform and the math stays correct.